Installation
Oculus Quest/Quest 2
Note: If an older version of Moonbeam is already installed, uninstall and remove it before going through the below steps.
All users should receive an apk file with the Moonbeam application
Use SideQuest to install the apk onto the Quest
If unsure how to use SideQuest follow this tutorial: SideQuest Tutorial
After the setup portion, you want to follow the instructions on Sideloading an .apk from an external source
Once it is successfully on your Quest you will find the package by going to the Apps screen -> Unknown Sources -> Moonbeam (Figure 1-3)
If Moonbeam does not appear under Unknown Sources, then redo the SideQuest tutorial
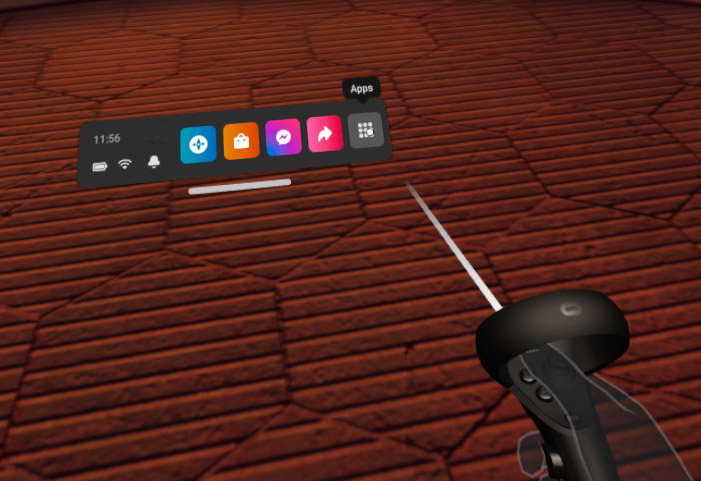
Figure 1
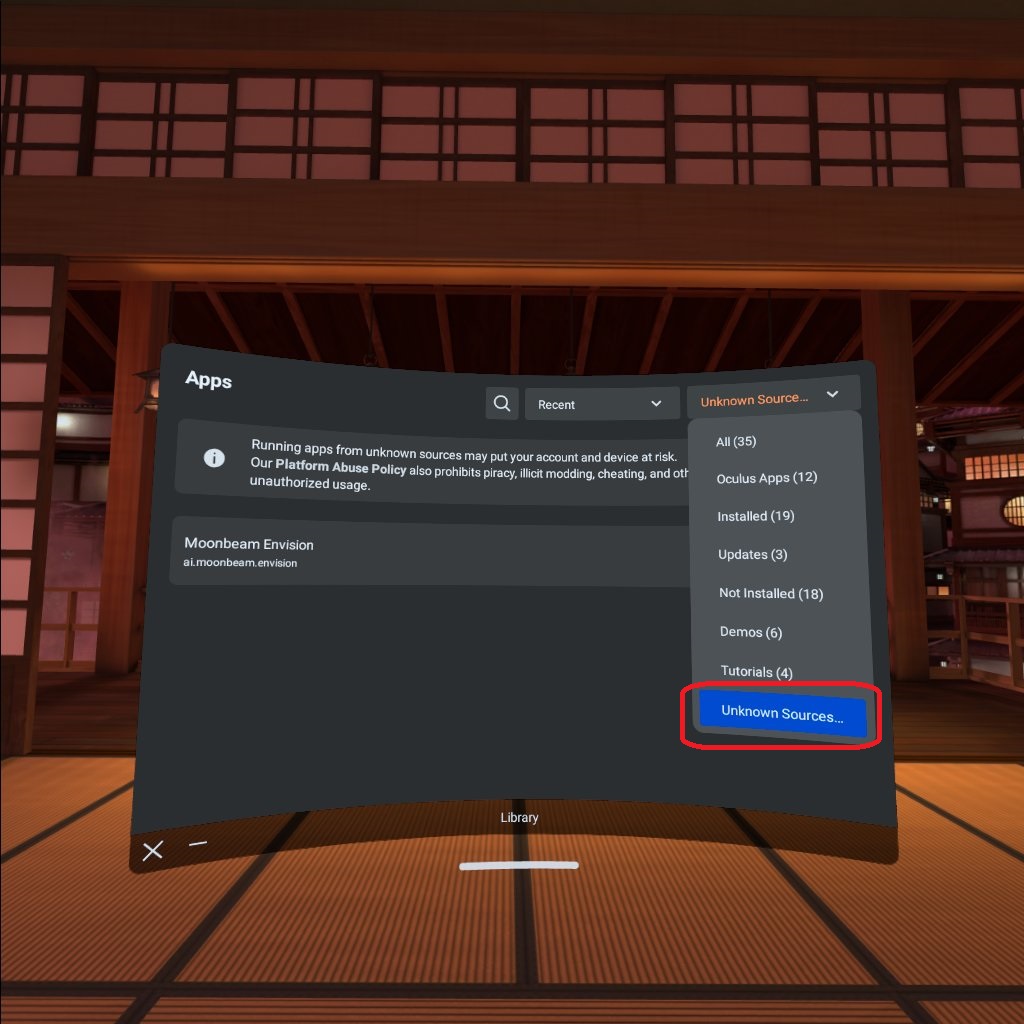
Figure 2
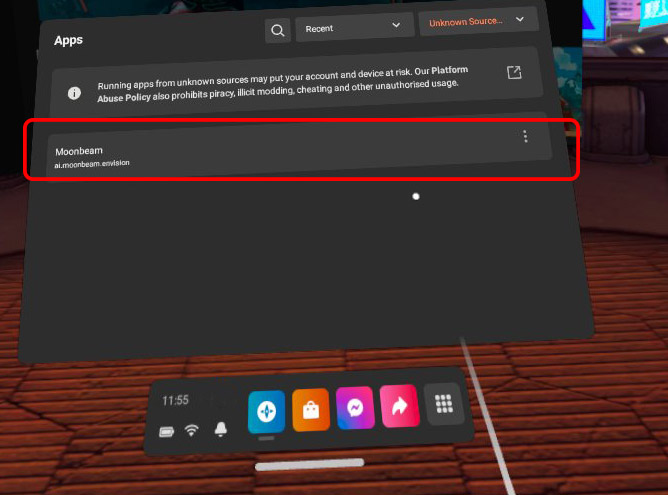
Figure 3
Desktop
Download the installer provided by Moonbeam
Windows will prompt, press “More info” and then press “Run anyway”
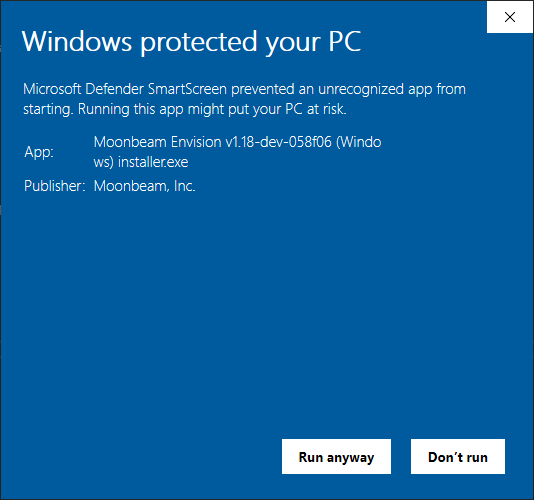
Figure 4
Follow through the settings
You can customize download location, shortcut, etc.

Figure 5
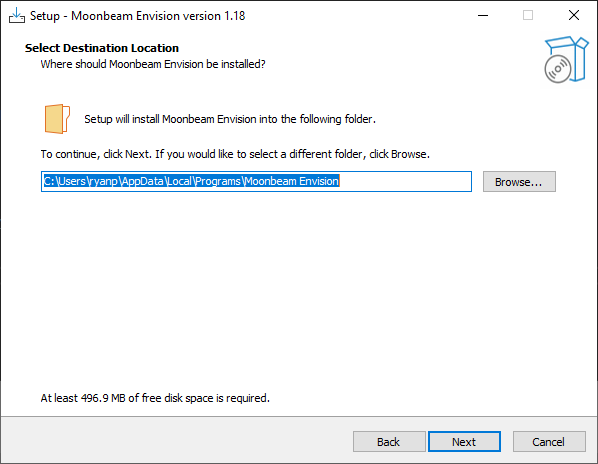
Figure 6
Press install and then open Moonbeam.
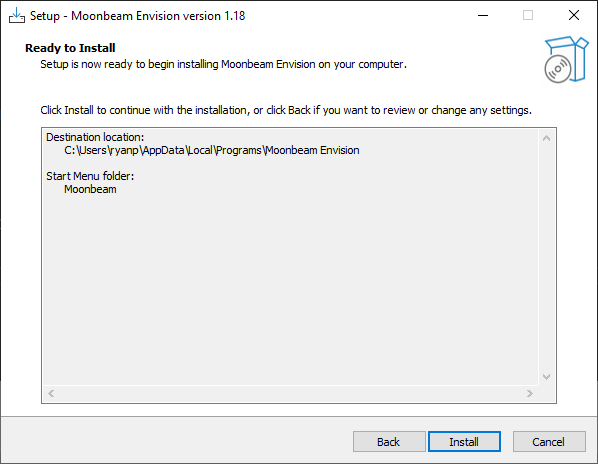
Figure 7
Uninstalling on Windows
Go to your settings and type “”Storage Settings” and then go to “Apps & features”.
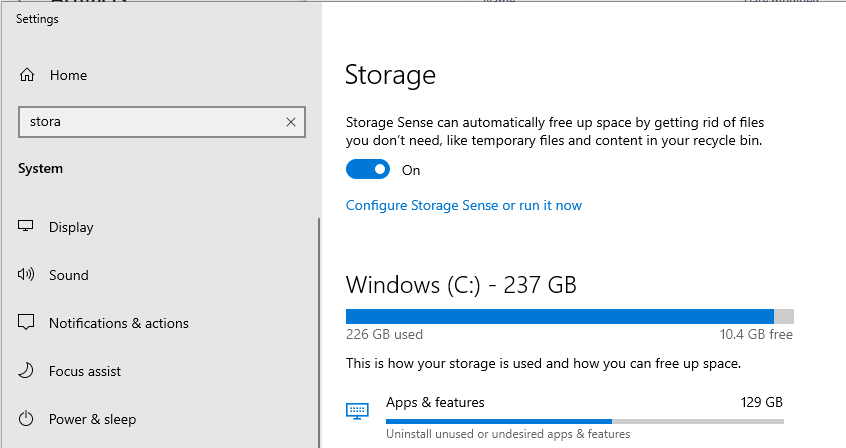
Figure 8
From storage settings, search for the app “Moonbeam Envision version #.##” and press uninstall.
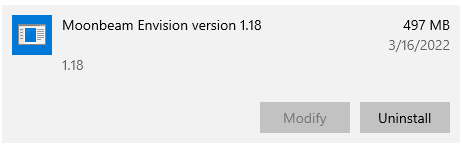
Figure 9